
Categories
Home DesignPublished September 17, 2025
Unlock Your Property's Potential: The Ultimate Guide to Adding an ADU

Have you ever looked at your backyard and wondered if there's more it could offer? Or perhaps you've considered ways to generate passive income, house a family member, or even create a dedicated workspace without moving? If so, you're not alone, and an Accessory Dwelling Unit (ADU) might just be the answer you've been searching for.
Once a niche concept, ADUs – also known as granny flats, in-law suites, tiny homes, or backyard cottages – are rapidly gaining popularity across the nation. They offer a flexible and impactful way to enhance your property, but embarking on an ADU project requires careful planning and a clear understanding of the process. This comprehensive guide will walk you through everything you need to know to unlock your property's full potential.
What Exactly is an ADU?
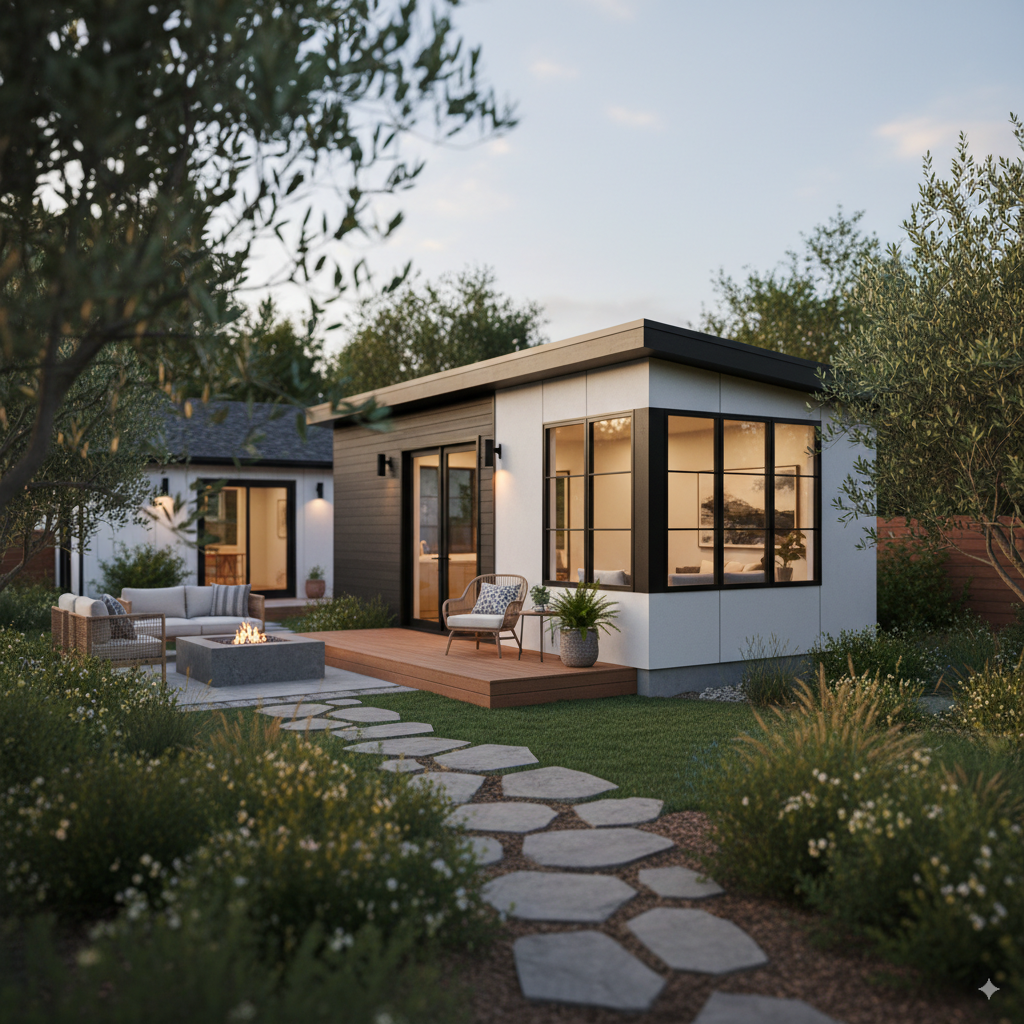
At its core, an ADU is a secondary housing unit on a single-family residential lot. It can be attached to the main house (like a basement apartment or garage conversion), or it can be a separate, detached structure in the backyard. The key is that it's a complete living space, typically including a kitchen, bathroom, and sleeping area.
The benefits of adding an ADU are numerous and diverse:
• Rental Income: This is often the primary driver for homeowners. An ADU can provide a significant stream of passive income, helping to offset mortgage payments or boost your financial security.
• Multi-Generational Living: Keep loved ones close while maintaining their independence. ADUs are perfect for aging parents, adult children, or other family members.
• Flexible Living Space: Need a dedicated home office, an art studio, a gym, or a guest house? An ADU offers the ultimate flexibility without the need for extensive interior renovations to your main home.
• Increased Property Value: A well-designed and constructed ADU can significantly boost the overall value of your property.
• Addressing Housing Shortages: On a broader scale, ADUs contribute to increasing housing density in existing neighborhoods, offering a sustainable solution to housing crises.
The ADU Journey: A Step-by-Step Overview
Adding an ADU isn't a weekend DIY project, but it's also not as daunting as building a brand-new house from scratch. Here's a general roadmap of the process:
Step 1: Research and Feasibility – The Crucial First Phase
This is arguably the most important step. Before you get too excited about floor plans, you need to understand what's possible on your property or a property that you are considering purchasing. If adding an ADU is part of your future plans, make sure that your real estate agent understands and finds properties where zoning and other restrictions will not prevent your dream.
• Local Zoning Laws: ADU regulations vary wildly by city, county, and even neighborhood. Research your local planning department's rules regarding setbacks, maximum size, height restrictions, parking requirements, and owner-occupancy clauses. Many jurisdictions have recently relaxed ADU rules to encourage their development, so don't assume previous restrictions still apply.
• Property Assessment: Evaluate your lot. Do you have enough space for a detached unit? Is your existing garage suitable for conversion? Consider the topography, access points, and existing utility connections.
• Budgeting: Get a realistic grasp of the costs involved. This includes design fees, permits, materials, construction labor, utility hookups, and potential landscaping. Costs can range dramatically depending on size, finishes, and location, but expect anywhere from $100,000 to $300,000+ for a new build.
• Financing Options: Explore how you'll pay for it. Common options include home equity loans, HELOCs, construction loans, or even refinancing your primary mortgage.
Step 2: Design and Planning – Bringing Your Vision to Life
Once you know what's feasible, it's time to design your dream ADU.
• Hire Professionals: Unless you're an experienced architect or builder, working with professionals is highly recommended. An architect or designer can help you optimize space, navigate regulations, and create a functional, aesthetically pleasing design. A general contractor experienced in ADU builds will be invaluable for the construction phase.
• Layout and Features: Consider who will use the ADU and for what purpose. Do you need one bedroom or two? A full kitchen or a kitchenette? Focus on efficient design and maximizing natural light.
• Energy Efficiency: Incorporate sustainable features from the start. Good insulation, energy-efficient windows, and appliances will save money in the long run and appeal to future tenants or occupants.
• Permit Drawings: Your chosen professional will develop detailed architectural and engineering plans that meet all local building codes and zoning requirements. These drawings will be submitted for permits.
Step 3: Permitting and Approvals – Navigating Bureaucracy
This step can often feel like the slowest, but it's essential for a legal and safe build.
• Submit Your Plans: Your architect or contractor will submit the detailed plans to your local planning and building departments.
• Reviews and Revisions: Be prepared for comments and requests for revisions from the city. This is a normal part of the process, ensuring everything meets code.
• Permit Issuance: Once your plans are approved and all fees are paid, you'll receive your building permits. This is the green light to begin construction!
Step 4: Construction – The Transformation Begins!
With permits in hand, construction can finally commence.
• Site Preparation: This involves clearing the site, grading, and digging foundations.
• Foundation: Laying the concrete slab or pier foundation.
• Framing: The skeleton of your ADU takes shape.
• Rough-Ins: Installation of plumbing, electrical wiring, and HVAC ducts before walls are closed up.
• Insulation and Drywall: Sealing the interior and preparing for finishes.
• Exterior Finishes: Roofing, siding, windows, and doors.
• Interior Finishes: Flooring, cabinets, fixtures, painting, and trim work.
Throughout construction, your general contractor will manage subcontractors, materials, and inspections. Regular inspections by city officials are mandatory at various stages to ensure compliance with building codes.
Step 5: Final Touches and Occupancy – Your ADU is Ready!
• Final Inspections: Once construction is complete, a final inspection will be conducted. Upon approval, you'll receive a Certificate of Occupancy (or similar document), signifying that the ADU is safe and legal to inhabit.
• Landscaping and Exterior: Don't forget to integrate your ADU seamlessly into your existing property with thoughtful landscaping and pathways.
• Furnishing and Marketing (if renting): If you plan to rent it out, furnish it thoughtfully to appeal to potential tenants. Then, it's time to list it!
Key Considerations for a Smooth ADU Project
• Communication is King: Maintain open and clear communication with your architect, contractor, and any other professionals involved.
• Contingency Budget: Always build in a contingency fund (10-20% of your total budget) for unforeseen issues or changes.
• Neighborhood Impact: Be mindful of your neighbors during construction. Inform them of your plans and try to minimize disruption.
• Future Flexibility: Design your ADU with future uses in mind. Can it easily convert from a rental to a family space or office if your needs change?
• Property Management (if renting): If you're renting, consider how you'll manage tenants – will you do it yourself or hire a property manager?
The Future is in Your Backyard
Adding an ADU to your property is a significant undertaking, but the rewards can be immense. Whether you're looking for financial freedom, a way to keep family close, or simply more functional space, an ADU offers a versatile solution that enhances both your lifestyle and your property's value.
By doing your research, planning diligently, and partnering with the right professionals, you can successfully navigate the ADU journey and unlock a world of new possibilities right in your own backyard.

Kirk Pugh
Owner - Broker/REALTOR® | KBT Realty | Keller Williams Realty | PLACE
or another way